
Welcome to the April Stamp of the Month Blog Hop!

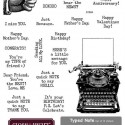
The April Stamp of the Month is entitled Typed Note (S1504) (Set of 19). Here is a picture of this stamp set:

Today is the start of the new Seasonal Expressions 2 Catalog and lots of new products! We have 2 new paper lines, new stamp sets, and lots of new embellishments. Want a new catalog? Just post a request in the comments and I will send you one or you can look at it online here.

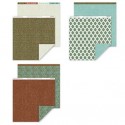
I opened up the new Jackson Paper Pack. I was in Heaven! Love the smell of a new paper pack. This stamp set seems very vintage to me so I pulled out my sponges and set out to make a collage looking vintage image for my card.

My card is a 5" x 7" card. Here are the measurements for the pieces:
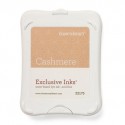
Cashmere cardstock 7" x 10"
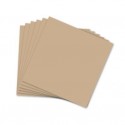
Cocoa Cardstock 5" x 7"
Barn Red Cardstock 4 ¾" x 6 ¾"
Jackson Brown Patterned Paper 2" x 4 ½" and 1 ½" x 4 ½"
Jackson Triangle Patterned Paper 3" x 4 ½"
Barn Red Cardstock 4 ¼" x 5 ½"
White Daisy Cardstock 4" x 5 ¼"
Jackson Juniper Patterned Paper - 5 pennants cut at 1" (Art Philosophy)
Pieces are adhered in the above order. All pieces are inked with Cocoa Ink.
Here is how I made this card.

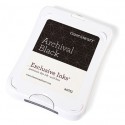
I started out by stamping the typewriter and the pointed finger in Black Archival Ink on the piece of White Daisy Cardstock. I chose the Archival Ink because it gives a darker, more intense black stamped image. Then, using the beautiful flourishes found in our stamp set, Love Life (D1482), I loaded the stamp set up with Versamark and stamped it so that it would not touch the stamped images. See the flourishes on the left bottom and right top corner? I heat embossed these images using our clear embossing powder. The flourishes will now resist any ink I sponge or stamp over it and will remain white.
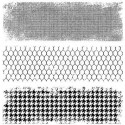
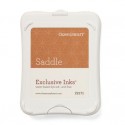
Then I took some of the sentiments, mounted them to one large acrylic block and stamped it in second generation Saddle Ink on the left side of the stamped image panel. I wanted to add some Barn Red to bring all of the colors in so I second generation stamped the chicken wire image from Distressed Backgrounds (D1544) with Barn Red Ink. I also added some Harlequin pattern in Barn Red from Fabulous You (C1533) on over the flourishes.
Between each step, I wiped off the embossed flourishes to keep them white.
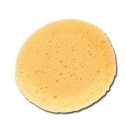
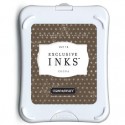
I now sponged Champagne Ink over the entire White Daisy Panel. When I sponge, I start on the scrap paper that I rest my cardstock on so that there are no big splotches on my artwork. I take my time and rub the ink into the cardstock. See the "sponge splotches" on my scrap paper below.

Then I sponged Cashmere Ink around the outside and towards the middle, leaving the center alone. This will give you a focal point and bring your eye towards your images.

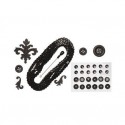
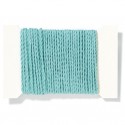
Then I assembled my card. The pennants were stamped using the alphabet stamp set, A Typeface (A1117), in Black Archival Ink and are shaped by rolling around the handle of my paper piercer and then just the top is adhered to the card. I like dimension and this adds a bit. I used some of our new Glacier Extra Thick Twine. It is tied into bows and adhered to the card with our Liquid Glass. I added some embellishments from our Black Mini Medley and Voila ........... my card!
Thank you for visiting my blog. I would love for you to show me a little love by leaving me a comment and then please go to our next artist, {Sheila Bennett's Blog} and see what she has made with this adorable stamp set.
The Typed Note Stamp Set can be purchased for $17.95 or if you purchase $50 in CTMH products, you can add this stamp set to your order for an additional $5. This stamp set is only available between April 1 – April 30, 2015.
You can purchase this stamp set as well as any of the supplies listed below on my website.
Supplies Used


Oh, I love it!! That's my first reaction, my gut instinct.
ReplyDeleteThank you. Terry Ann!
DeleteWow, just wow Melinda!! Beautiful card! So much work & fine details went into it & it totally works!
ReplyDeleteThank you for your nice comment, Pam.
DeleteWonderful eclectic card!
ReplyDeleteThanks, Paige!
DeleteOMG! That's it...I'm speechless.
ReplyDeleteLOL. Thank you!
DeleteGorgeous!!
ReplyDeleteThanks, Lori.
DeleteThis is really lovely! That embossing just pops!
ReplyDeleteSuch a nice comment, Wendy. Thank you!
DeleteI love everything about these cards!
ReplyDeleteThank you, Angela.
DeleteWow! These cards and your stamping techniques are amazing!
ReplyDeleteThis card was a labor of love. Love the cards where I can just play!
DeleteThe panel alone would make a great card, you went above and beyond.....just stunning....I am in love with this card.
ReplyDeleteYou are so nice, Michelle! Thank you!
DeleteWhat a gorgeous card!
ReplyDeleteLove all the layers. Your card looks fabulous!
ReplyDeleteWow! Your cards are my favorite I've seen so far with this set...
ReplyDeleteYour card is fabulous! At first I thought it was a canvas gift. I love all of the layers. You were able to create a lot of dimension. And thanks for the tutorial.
ReplyDeleteGreat card, Melinda! Love every last detail!
ReplyDeleteTruly stunning! It has inspired me to make my own creation...as soon as I get some of that wonderful Jackson paper! :)
ReplyDeleteThanks for the detailed instructions and the close up pictures! I love the look you achieved!
ReplyDeleteWow! Just Wow - yes that is my response to this amazing card as well! THANK YOU THANK YOU THANKYOU for graciously sharing the step by step instructions, too - that was so very cool of you!
ReplyDeleteI saw these cards exploding all over Pinterest. Lovely! Thanks for sharing how you created it. Very cool.
ReplyDeleteYour collages are fabulous!
ReplyDeleteOh wow, these cards are amazing! The sepia toned one is my favourite but the other one is brilliant as well!
ReplyDeleteWhat a great technique. Funny how one simple thing can make it look so different
ReplyDeleteGreat technique! Very Tim Holz- like...
ReplyDelete