

Welcome to the Close to My Heart Focus on Stamping Techniques Blog Hop. This hop I am following {Melissa Robinson's Blog.} We have 18 Close to My Heart Consultants participating in our Close to My Heart Focus on Stamping Techniques Blog Hop. If you lose your place while traveling through our blog hop, the complete list of participants can be found here. Thank you for hopping through our Blog Hop.
I have used a couple of different stamping techniques to make a one layer Christmas Card. I wanted to feature the emboss resist technique.
I measured the stamp I wanted to use for my card and my stamp measured 3 inches tall. The height of my card is 5.5", so I decided to mask off 1 inch on the top and the bottom of the card using Eclipse tape. This is easy to do using the grid on my Close to My Heart Versamat.

I loaded up the big Pine Tree from the Always Grateful Stamp Set (C1559) with Versamark Watermark Ink. I stamped the tree at different heights, inking up the stamp each time with the Versamark ink.

Then I sprinkled on our Clear Detail Embossing Powder and heat embossed the trees.

I took a piece of Eclipse Tape and punched a 1.5" circle out and placed it at the top right corner.

Then I sponged on Champagne Ink followed by Canary Ink. Once I sponged on my moon, I removed the Eclipse tape.

I placed the circle I punched out from the Eclipse tape over my moon to "protect" it from the other ink and sponged on Glacier ink and then Crystal Blue Ink. To get a more authentic look when you are sponging backgrounds, you should always use at least 3 different colors.

Now I sponge on Sapphire ink and the trees I stamped and embossed appear. When I use the sponging technique, I start the sponging on the scrap paper that is beneath my artwork and then, using a circular motion, move onto the artwork. That way the color is less splotchy. I add more ink until I am happy with the look. To frame my artwork, the outsides are darker.

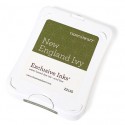
Now I pick up my tree stamp and ink it up with New England Ivy ink. I add some black ink to the stamp using a sponge and pouncing it onto the stamp. Then I stamp the tree onto my card among the white emboss resist trees.

What do you think? It is taking shape.
I take a paper towel and carefully wipe off the ink on the white emboss resist trees.

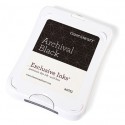
And here is the part I like best. I add Santa and his reindeer from the Believe in Christmas (D1666) over my moon with Black Archival ink.

Off comes my masks.

A cute sentiment.


Thank you for visiting my blog.
By the way, I would love for you to leave me a comment and then please go to our next artist, {Catherine Nowak's Blog.}
You can purchase any of the supplies listed below at www.melindaeveritt.ctmh.com.
Supplies Used


OMG ~ This is absolutely fabulous!!!! Melinda this is such a stunning card and thank you for the explanation and steps to make it.
ReplyDeleteWOW! Your card is AMAZING!
ReplyDeleteOh my gosh, Melinda, this is incredible!!! Your instructions are perfect - many thinks!!
ReplyDeleteWOW! That is really impressive!
ReplyDeleteBeautiful card and great instructions to recreate it. Thanks!
ReplyDeleteAbsolutely gorgeous card! It is perfect with every touch. Love it!
ReplyDeleteStunning card! I love this!
ReplyDeleteLove it! Masking and resist techniques are perfect for this wintery scene! Thanks for sharing!
ReplyDeleteAbsolutely AMAZING! I love it so much! <3 Great instructions. I want to go try this now! haha
ReplyDeleteFantastic card! Great instructions.
ReplyDeleteAwesome card!
ReplyDeleteBeautiful card!!! Great techniques used!
ReplyDelete