
Welcome to the Close to My Heart
National Papercrafting - Live Your Day Blog Hop

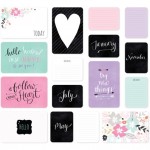
Celebrate National Papercrafting Month with the exclusive Picture My Life™ Live Your Day scrapbooking program. It is available for January only!
I have a terrible habit of being late with birthday cards and presents. I forget to look at my family calendar. What I have wanted is a birthday book. A birthday book is a small book where I can keep track of important birthdays. Then when I am out shopping, I can easily check this book and get that important present and get it on time.
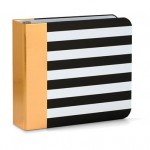
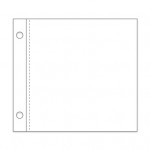
These cards were perfect for this project. I grabbed our new shiny Instalife Album - Black and White and added the 4" x 4" Mini Memory Protectors and started making my birthday book. I love this little shiny gold, black and white album. The outside of the album is coated, which will help it hold up in my purse.
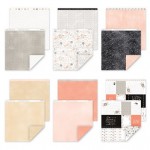
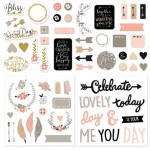
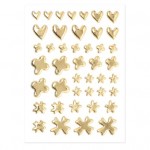
For this project I also added some patterned paper from our Charlotte paper pack as well as the Charlotte complements and our cute gold Treasure Puffies.
Here's my album cover.

National Papercrafting - Live Your Day Blog Hop

This hop I am following {Wendy Kessler's Blog.} We have almost 20 Close to My Heart Consultants participating in our Close to My Heart Simply Fundamentals Blog Hop. If you lose your place while traveling through our blog hop, the complete list of participants can be found here. Thank you for hopping through our Blog Hop.
Celebrate National Papercrafting Month with the exclusive Picture My Life™ Live Your Day scrapbooking program. It is available for January only!
There are so many uses for our Picture My Life Cards. You can use them as designed in their special page protectors, but why stop there? Add them to a traditional layout as a journaling or decorative block. The sayings are wonderful! Make a card with them or how about a mini album?
I have a terrible habit of being late with birthday cards and presents. I forget to look at my family calendar. What I have wanted is a birthday book. A birthday book is a small book where I can keep track of important birthdays. Then when I am out shopping, I can easily check this book and get that important present and get it on time.
These cards were perfect for this project. I grabbed our new shiny Instalife Album - Black and White and added the 4" x 4" Mini Memory Protectors and started making my birthday book. I love this little shiny gold, black and white album. The outside of the album is coated, which will help it hold up in my purse.
For this project I also added some patterned paper from our Charlotte paper pack as well as the Charlotte complements and our cute gold Treasure Puffies.
Here's my album cover.

The inside cover I used some of the complements. I cut down a 4" x 6" Live Your Day Picture My Life card to 4" x 4" so that it would fit into the mini memory protector. Then I added some more stickease and a gold puffy. So easy!

January page. On the right hand side, you can either write the birthdays on the card itself or take an Expo vis a vis transparency pen and write in the birthdays. With the Expo vis a vis pen you can make changes as needed in your birthday list. So this book can be used year after year.

February pages. I cut the Be Happy from one of the larger cards. I used all of the cards including pieces of the larger cards when I cut the 4" x 6" cards down to the 4" x 4" I needed for my album.

Here is a little better picture of the February left side (without the glare).


March Left

March Right.


May Pages.


My next blog post will be the next six months of my album. Thank you for visiting my blog.
By the way, I would love for you to leave me a comment and then please go to our next artist, {Catherine Nowak's Blog.}
You can purchase any of the supplies listed below at www.melindaeveritt.ctmh.com.
Supplies Used


What a GREAT idea. And this is just so beautiful. I love how everything coordinates together and how organized it is!
ReplyDeleteCute and functional, very nice.
ReplyDeleteWow! I love this. It would be a fantastic workshop idea!
ReplyDeleteWOW! WOW! WOW! So cool. Love how you used these cards to make a perpetual calendar. :)
ReplyDeleteOMG! I love this idea! Wonderful.
ReplyDeleteLove, love, love!! Great ideal!
ReplyDeleteSuch a clever idea! I love it!
ReplyDeleteI am absolutely in love with what you did here!
ReplyDeleteSuper cute! I got my friend on of these albums for a gift, I'm going to have to suggest the PML cards and have her check out your post, it's wonderful
ReplyDeleteFabulous! Now I may have to get another set ;-).
ReplyDeleteWhat a great idea! Looks like a great gift too!
ReplyDelete