
Welcome to the Close to My Heart
Artistry Blog Hop

Artistry Blog Hop

I am following {Melissa Robinson's Blog.} We have 30 Close to My Heart Consultants participating in our Close to My Heart Artistry Blog Hop. If you lose your place while traveling through our blog hop, the complete list of participants can be found here. Thank you for hopping through our Blog Hop.
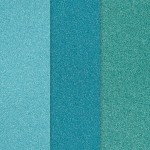
Did you hear that we have an awesome new Cricut Collection called Artistry? I am loving playing with this cartridge and I am sure that you will as well. It comes with 3 D size Stamp Sets and a full package of assorted cardstock containing our new colors. So, you are up and running right when you open the package!
Are you the proud owner of an Explore or an Explore Air? If you are, you have a second option. You can either purchase the regular Artistry Collection for $99 or you can purchase the Digital Collection for $79. With the Digital Collection, you do not get the cartridge or the handbook. Your Artistry code will be mailed to you along with your stamp sets and cardstock.
All of our cartridges contain 700 images. No other cartridge on the market has that many images. This is a great bargain and will become one of your go to cartridges. The Artistry cartridge has a ton of images that any papercrafter will enjoy.
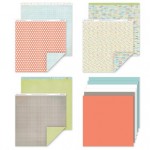
So what am I showing you today? Using Cricut Design Space, I turned one of the Artistry images into a card. I was having so much fun that I made two of these cards, both using our new Zoe Paper Collection. Here are my cards.

Did you hear that we have an awesome new Cricut Collection called Artistry? I am loving playing with this cartridge and I am sure that you will as well. It comes with 3 D size Stamp Sets and a full package of assorted cardstock containing our new colors. So, you are up and running right when you open the package!
Are you the proud owner of an Explore or an Explore Air? If you are, you have a second option. You can either purchase the regular Artistry Collection for $99 or you can purchase the Digital Collection for $79. With the Digital Collection, you do not get the cartridge or the handbook. Your Artistry code will be mailed to you along with your stamp sets and cardstock.
All of our cartridges contain 700 images. No other cartridge on the market has that many images. This is a great bargain and will become one of your go to cartridges. The Artistry cartridge has a ton of images that any papercrafter will enjoy.
So what am I showing you today? Using Cricut Design Space, I turned one of the Artistry images into a card. I was having so much fun that I made two of these cards, both using our new Zoe Paper Collection. Here are my cards.

Do you like these cards as much as I do? They make me happy! I couldn't help myself and added some Sparkles for the keys. I am all about that Bling! The blue and green typewriter card uses our blue glitter paper as well. The hearts came from the Chalk it Up Assortment.
The typewriter is not a card on Artistry. It is just an image. I used Cricut Design Space to turn it into a card. Here is how I did that.
I chose the typewriter image and then ungrouped the layers. Then I copied and pasted the bottom layer so that I now had two bottom layers. After choosing the duplicated layer, I went into the Edit tab and clicked the mirror button. That flipped the duplicated typewriter bottom layer. Then I placed the two images close to each other but not touching. This is how it looks.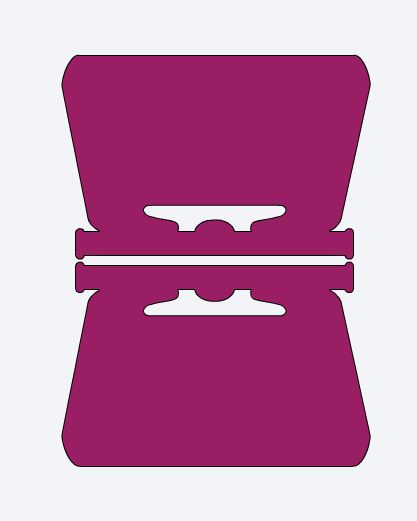
I went back to Artistry and chose a rectangular image. I added it to the middle - I wanted to connect the two pieces so I would now have a card.
I placed the rectangle where I wanted it and then I selected the entire set of images and clicked the weld button. This is what I got.
 Then all I had to do was score the middle and fold my card. I was so excited that this came out like I pictured it in my head.


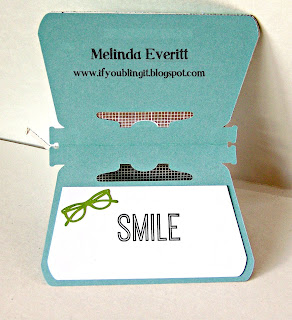
I even decorated the inside of the cards.

The typewriter is not a card on Artistry. It is just an image. I used Cricut Design Space to turn it into a card. Here is how I did that.
I chose the typewriter image and then ungrouped the layers. Then I copied and pasted the bottom layer so that I now had two bottom layers. After choosing the duplicated layer, I went into the Edit tab and clicked the mirror button. That flipped the duplicated typewriter bottom layer. Then I placed the two images close to each other but not touching. This is how it looks.

I went back to Artistry and chose a rectangular image. I added it to the middle - I wanted to connect the two pieces so I would now have a card.

I placed the rectangle where I wanted it and then I selected the entire set of images and clicked the weld button. This is what I got.


I even decorated the inside of the cards.


I used one of the sentiments in the coordinating D size stamp sets. That adorable set of glasses on the inside is another one of the images on the Artistry. Now how cool is that?
Now to make it even easier for you, here is the Design Space file: https://us.cricut.com/design/#/canvas/30087846
By the way, I would love for you to leave me a comment and then please go to our next artist, {Paige Dolecki's Blog.}
You can purchase any of the supplies listed below at www.melindaeveritt.ctmh.com.


Very cute!! That's alot of bling!!
ReplyDeleteGina, thank goodness Sparkles are cheap!
DeleteLove these cards cant wait for my cart to get here!
ReplyDeleteLove the cards and it was so nice you included on how you constructed it in DS.
ReplyDeleteThese cards are absolutely adorable, Melinda! They are my fave! I don't have the ability to download DS so it's either time for an upgrade or... LOL
ReplyDeleteLoved It ! I'm ready to try it
ReplyDeleteI am absolutely stunned by how amazing these turned out!! So cute and clever Melinda!! I am inspired :)
ReplyDeleteThank you, Jen. They were so much fun to put together.
DeleteCute typewriters! And thanks for the great tutorial on how to create a card with any shape.
ReplyDeleteThank you for sharing the file for this fun projects. Love your typewriter cards
ReplyDeleteLove love love!!
ReplyDeleteOh my goodness these are fabulous! You have done a wonderful job, and thank you for such clear instructions.
ReplyDeleteThank you so much for sharing this card! I had created a card using the typewriter, but mine was way more complicated than this! Thank you Melinda
ReplyDeleteOh my goodness Melinda, these are so stinkin' cute!
ReplyDeleteJust gorgeous!
ReplyDeleteLove this! Thanks for providing the Cricut file. I've downloaded it for future use!!
ReplyDeleteIt's just not you ( or me) if it's not blinging away I love it!! Just such a fun card just love it!!
ReplyDeleteThat way seems simpler than mine. The glitter typewriter is so cute
ReplyDeleteOh boy, I am going to have to get on board with Design Space. These cards are just too cute. They would be perfect for a co-workers bday.
ReplyDeleteOMG ~ I so love the bling for the keypad.
ReplyDeleteFabulous cards, Melilnda! That's for the photo tutorial on attaching the two pieces and for sharing the DS file. Thank you so much!
ReplyDelete:) Marie
Fabulous cards, Melilnda! That's for the photo tutorial on attaching the two pieces and for sharing the DS file. Thank you so much!
ReplyDelete:) Marie
Fantastic cards!
ReplyDeleteVery cute!! Thanks for the inspiration and sharing the file!
ReplyDeleteThese are ADORABLE!!
ReplyDeleteJen